- Pick out any fabric from a fabric store...I usually go to Joanns but any fabric will do.
- The fabric must be folded. Cut a 44 inch (or 22 inch folded) width by 36 inch length.
- Turn the fabric right sides together.
- From the top go down three inches from where the opening of the fabric is and put tape around that edge for the button hole for the string to go through.
- Sew 1/2'' seam allowance down to the tape, follow the side with skipping the tape (for the button hole) and then sew the rest of the side and the bottom. make sure to backstitch at the beginning and also the end.
- Iron the fabric and the seams so they are flat. Also, iron a seam for the top of the bag.
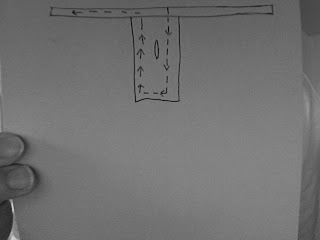
- Diagram below explains: start from the top seam of the bag and go down to were the hole is and go around it. Come up and go around the entire top seam. Make sure to back stitch at the beginning and end.
8.Where the top seam is from the diagram fold it down over the button hole so the button hole is fully exposed inside the bag.
9. Once folded over the button hole, sew around the entire bag again, just how you sewed the top seam around the entire bag. (Make sure to Backstitch at the beginning and end)
10. Put and type of string or ribbon through the bag and viola! You have yourself a Laundry bag :)


No comments:
Post a Comment